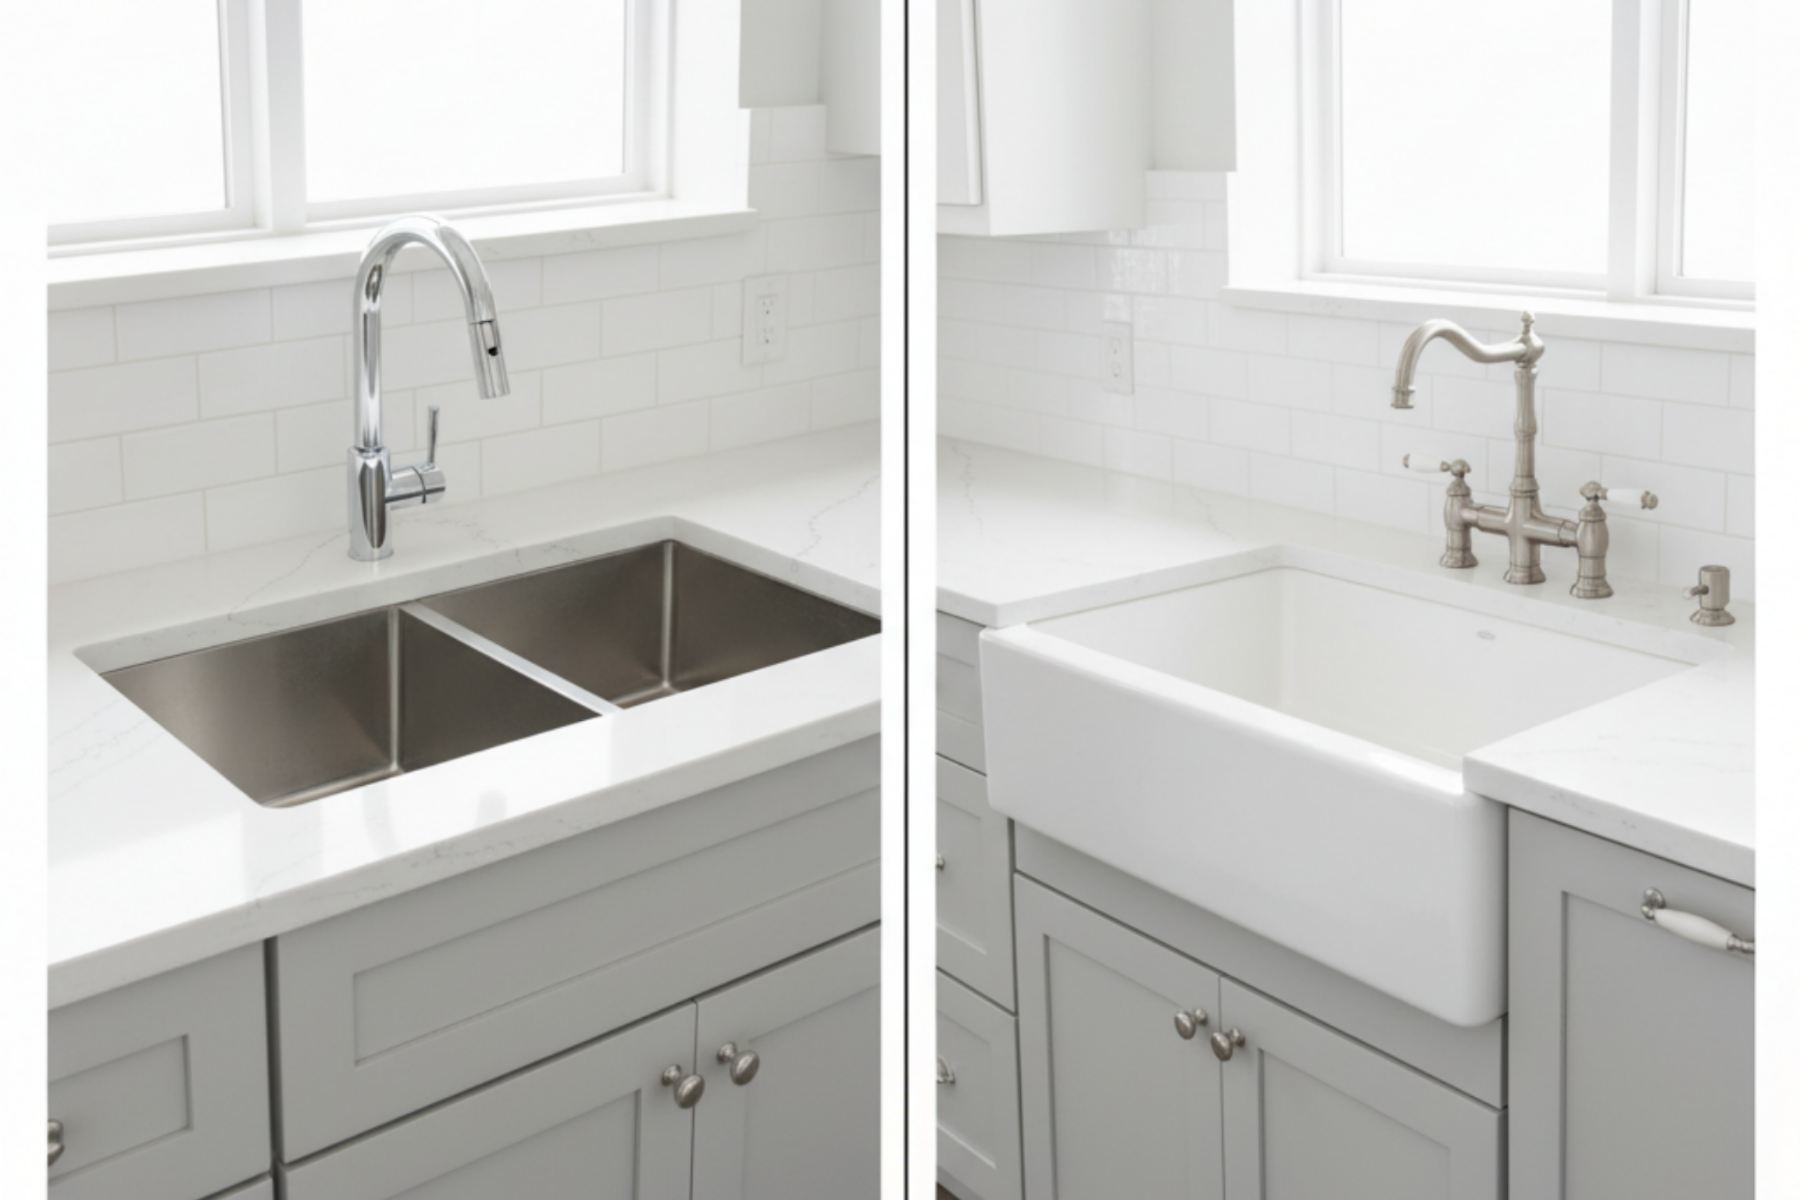
From Double Bowl to Farmhouse: A Step-by-Step Guide to a Style Upgrade
The change from a standard drop-in or undermount double-bowl sink to a bold, charming farmhouse (apron front) sink is one of the most impactful style upgrades you can make in a kitchen. While the transformation is dramatic, the process requires careful planning and a crucial step: cabinet modification.
Here is the step-by-step guide to achieving this major style shift.
Step 1: Planning and Preparation
- Measure and Choose: Farmhouse sinks come in various depths (front-to-back) and apron heights. Measure the existing cabinet width and depth, and choose a sink that will fit with minimal side-to-side modification.
- Gather Supplies: You'll need lumber for support framing, power tools (saw, drill), construction adhesive, screws, and safety gear.
- Remove the Old: Disconnect all plumbing and carefully remove the old sink and disposal.
Step 2: The Crucial Cabinet Modification
The main difference is the apron front, which requires the top cabinet fascia (false drawer front) to be cut out.
- Mark the Cut: Hold your new sink up to the cabinet face and mark the exact dimensions of the apron and bowl (allowing for 1/8 inch clearance on all sides).
- Cut the Cabinet: Using a circular saw, jigsaw, or reciprocating saw, carefully cut out the marked section of the cabinet face.
- Install Support Frame: Farmhouse sinks are heavy. Build a sturdy frame inside the cabinet using 2x4s or plywood to support the sink's weight from underneath. The top of this frame determines the final height of the sink rim.
Step 3: Countertop Adjustment (If Needed)
If you are keeping your existing countertop, the change from a small double-bowl cut-out to a large single-bowl cut-out often requires professional stone cutting.
- For Laminate/Wood: Carefully expand the existing hole using a jigsaw to match the template provided with your farmhouse sink.
- For Stone/Quartz: Stop! Call a professional fabricator. Cutting stone or quartz in place to this degree is extremely dusty, risky, and requires specialized tools.
Step 4: Final Installation and Sealing
- Set the Sink: Place the farmhouse sink onto the support frame. Adjust the frame height until the sink rim is perfectly level and flush with (or slightly below) the surrounding countertop.
- Seal the Gaps: Apply a continuous bead of 100% silicone sealant in all seams: between the sink's apron and the cabinet, and between the sink's rim and the countertop. Tool the bead smooth for a seamless look.
- Plumbing: Reinstall the faucet and disposal, connecting the new drain configuration.
With a few strategic cuts and solid support, your kitchen can enjoy the timeless, sophisticated upgrade of a farmhouse sink!

.svg)
%204.svg)
.png)
