Curing "Countertop Cancer" on a Budget: A DIY Guide for Old Sinks
"Countertop Cancer," the dreaded water damage and rot around your sink, doesn't always wait for a new sink budget to appear. If the damage is localized and you're not ready for a full replacement, you can perform a temporary, but surprisingly long-lasting, cure with just a few inexpensive supplies.
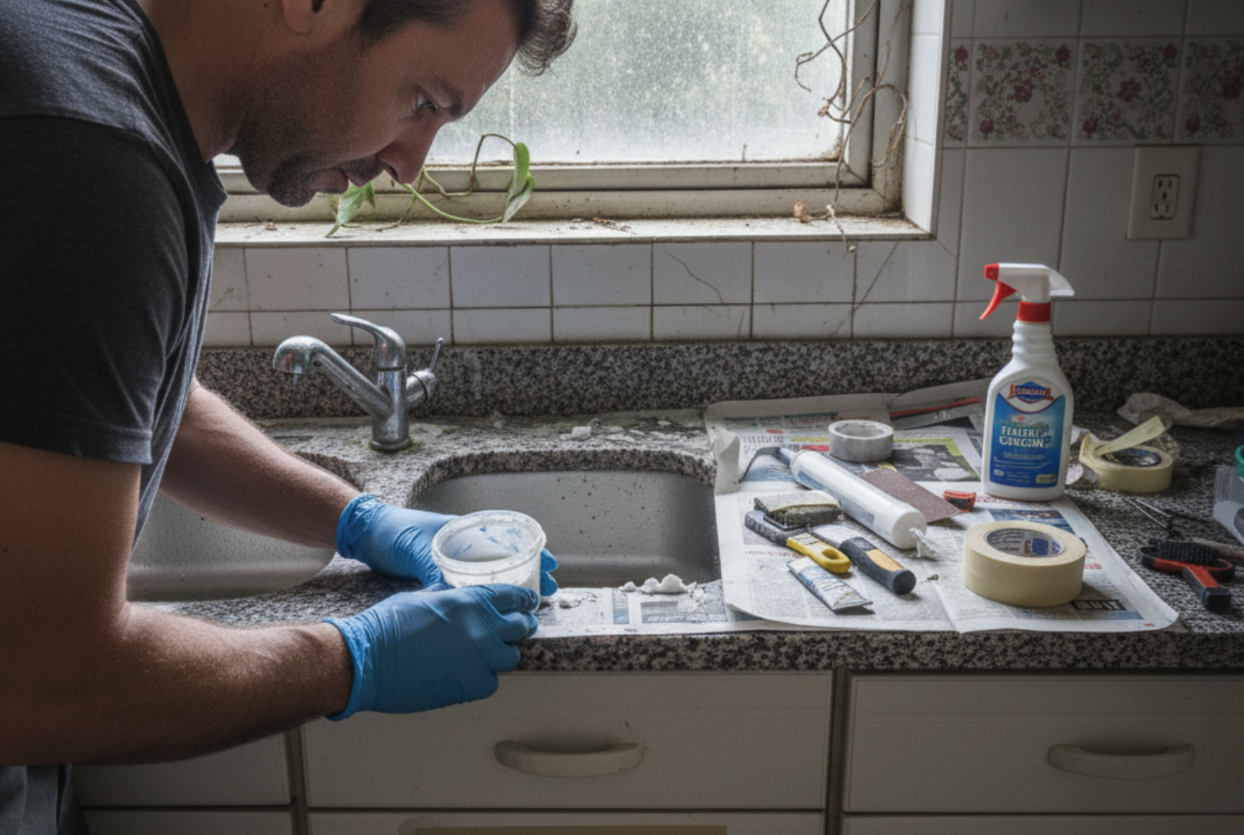
This guide focuses on repairing the damaged substrate without removing the sink, which is necessary if the sink is glued down or if you are aiming for the absolute minimum cost.
Step 1: Dry Out and Diagnose
The first step is stopping the active water penetration and drying out the rot.
- Stop the Leak: Scrape out any old, cracked, or moldy caulk around the sink rim. Clean the area thoroughly with rubbing alcohol.
- Aggressive Drying: Use a small fan or a hairdryer (on a low-heat setting) pointed at the damaged area for several hours, or even a full day. Moisture must be gone.
- Expose the Damage: If possible, use a utility knife to carefully cut away any swollen, soft particleboard from the underside or the immediate edge that is easily accessible.
Step 2: The Budget Cure - Stabilize the Wood
You need to re-harden the soft, rotten wood to give it structure again.
- The Hero Product: Liquid Wood Hardener (an epoxy consolidant). This is a thin liquid that penetrates and solidifies soft wood fibers. It's affordable and essential for this repair.
- Application: Apply the hardener generously to all the exposed, soft, or damaged wood. Use a small brush or a syringe (without the needle) to get it deep into any cracks or voids. Important: Follow the manufacturer’s ventilation warnings.
Step 3: Fill and Fortify (Optional but Recommended)
If you had to remove large pieces of rotten wood, you need to fill the gap.
- The Budget Filler: Use an epoxy putty stick or a cheap two-part wood filler. Knead the putty stick until activated and press it firmly into the voids you created, smoothing it out with a damp putty knife.
- Why Epoxy: It cures rock-hard, is completely waterproof, and is easy to sand, giving you a smooth, stable edge.
Step 4: The New Seal
Once the filler is cured and the hardener is dry, you must create a flawless, new seal to prevent the cancer from returning.
- Clean: Re-clean the sink rim and counter surface with denatured alcohol.
- Seal: Apply a continuous, thin bead of 100% silicone sealant where the sink meets the countertop. Tool it with your finger or a caulk tool for a smooth finish, wiping away all excess immediately.
- Cure: Do not use the sink for 24-48 hours. A patient cure time is the difference between a successful fix and an immediate failure.
This budget repair won't make the countertop look brand new, but it will stop the rot in its tracks and significantly extend the life of your existing kitchen setup.

.svg)
%204.svg)
.png)
